Constructing a website demands complex work that needs strategic planning together with execution conventions and continuous maintenance. Completing every step in website development leads to better efficiency and effectiveness for personal blogs and business websites as well as e-commerce platforms. The How to Create a Website and process organized properly creates websites that have great usability together with aesthetic value and performance enhancement and scalability capabilities.
We will demonstrate the complete web development process which begins with planning and finishes with deployment in this guide. The entire project depends on each level so design and development teams with business stakeholders stay on course because of a design framework.
The guide delivers both fundamentals and realistic code samples alongside professional methods which simplify every stage of the website development journey for complete beginners and established professionals. If you need website services, you can find us at Mindustrious.
Understanding the Website Making Process - Step by Step Beginner's to Experts Guide 2025
The art of developing websites extends beyond code writing because developers construct virtual environments which fulfill user needs as well as business objectives. Website development features four key elements which designers must consider: design aspects along with functionality needs and performance demands and security standards.
Workflows that maintain smooth processes benefit developers working independently and those who are members of development teams by decreasing time requirements as well as error frequency and improving total quality standards.
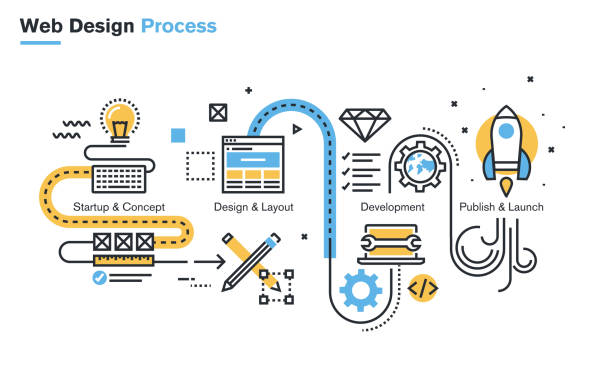
A website making process contains these fundamental eight steps that guide the creation project:
- The first step includes the process of gathering requirements alongside goal definition along with project scope planning.
- Information Architecture – Structuring content logically for easy navigation and usability.
- Building wireframes includes drawing web structure blueprints which helps users view page arrangements.
- Web Design includes typography and color combination selection together with creating user interfaces (UI) and selecting elements for the platform.
- Content Creation – Preparing high-quality text, images, and multimedia assets.
- The website making process requires programmers to author frontend and backend programming code which creates functional website elements.
- Testing together with Quality Assurance entails the detection of errors followed by their resolution while ensuring quick responses and fast performance.
- Website Launch & Deployment – Making the website live and monitoring post-launch performance.
Step 1: Discovery – Laying the Foundation
The discovery phase stands as the most vital component during the website making process. Development work starts only after stakeholders together with developers establish precise website objectives for programming.
The initial part of web development demands teams to study target users and pick essential features and study market competitive offerings. Stating project expectations and deliverables in a specific plan results in complete alignment between all participants involved in project work.
The teams make their choices regarding the technology stack selection at this point. The technology requirements of a small business website can successfully operate with WordPress or static HTML coding.
But, dynamic web applications require extensive development through integration of React.js with Node.js coupling a database backend with MongoDB or PostgreSQL.
Setup of a basic Express.js server can be summarized through the following steps:
|
const express = require('express'); const app = express(); app.get('/', (req, res) => { res.send('Welcome to My Website!'); }); app.listen(3000, () => { console.log('Server is running on port 3000'); }); |
A comprehensive plan developed in advance minimizes future mistakes that prove costly for the project. The right combination of user need identification with proper technology selection and precise purpose definition allows developers to reduce development time and cost throughout the project’s subsequent stages.
Step 2: Information Architecture – Structuring the Step-by-Step Website Development
The process of arranging content for smooth user navigation is what Information architecture (IA) represents. When IA planning is well executed visitors can quickly locate information and interact better with the website. Confused users turn away from disorganized websites which results in greater abandonments and eventually diminishes business success.
A high-quality information architecture consists of developing categories then organizing navigation menus while creating rational content organization.
An e-commerce website needs straightforward access to categories which include "Home," "Shop," "About Us," and "Contact." A basic website structure in JSON format can be demonstrated by the following example:
|
{ "website": { "home": "/", "shop": { "categories": "/shop/categories", "product_page": "/shop/product" }, "about": "/about", "contact": "/contact", "blog": "/blog" } } |
Prior development work starts, creating a website navigation system requires building the Information Architecture. Creating wireframes and sitemaps helps website arrangements become more logical so users along with search engines maintain smooth site navigation and indexing.
Step 3: Wireframing – Sketching the Layout
Wireframing serves as an essential process that requires creating the structure diagram of a website ahead of design implementation. At this phase engineers view how different page layouts along with element positions and system operations should function. Wireframes function as building layouts used to direct developer and designer creation of interfaces that serve users effectively.
The creation of wireframes happens through software including Figma, Adobe XD and Balsamiq. The design stays clear when wireframes present basic layouts while omitting colors and fonts. A simple HTML wireframe looks as shown below:
|
<!DOCTYPE html> <html lang="en"> <head> <title>Wireframe Example</title> <style> body { font-family: Arial, sans-serif; } .container { width: 80%; margin: auto; } .header, .footer { background: #ddd; padding: 20px; text-align: center; } .content { min-height: 400px; padding: 20px; } </style> </head> <body> <div class="container"> <div class="header">Header (Logo & Navigation)</div> <div class="content">Main Content Area</div> <div class="footer">Footer Information</div> </div> </body> </html> |
An iterative review process should happen to wireframes until they reach completion since they constitute the base for actual design implementations. A properly designed wireframe enables users to see how design features will work with intended functionality.
Step 4: Web Design – Creating a Visual Identity
The main responsibility of web design consists of visual attractiveness alongside user experience (UX). At this stage designers select both visual elements and interface components and determine color schemes, typography styles to create an attractive user experience. Quality design both attracts visitors and maintains their interest so retention rates improve.
Websites with great designs must be adaptive since they should display well across all display sizes. The user-friendly design features of Bootstrap and Tailwind CSS frameworks contribute to achieving responsive designs. The following CSS style guide displays button and typography guidelines for design purposes:
|
body { font-family: 'Arial', sans-serif; color: #333; background-color: #f8f9fa; } h1 { color: #0056b3; } .button { background-color: #007bff; color: white; padding: 10px 20px; border: none; cursor: pointer; } .button:hover { background-color: #0056b3; } |
A quality website exceeds mere visual attractiveness. The adoption of web design improves interaction with users while developing brand recognition through principles that support persons with disabilities in their use of platforms. Design standards ensure websites present usable features that serve a wide range of users.
Step 5: Content Creation – Crafting Engaging & SEO-Friendly Content
Step-by-Step Website Development heavily depends on effective content creation among all its essential components. Quality content stands above all else because websites without compelling information that delivers value cannot succeed even when they look attractive. The website uses various media elements like text and visuals and videos to deliver its essential information and purposes.

The creation of content requires continuous attention to the personas which the content targets. The provided content must serve as an informative source that displays proper structure together with clear readability.
The page structure becomes easier for readers to follow while search engines understand it better when developers use headings (<h1>, <h2> and <h3>) organized in a logical system. The optimization of images should focus on both reduced loading time and maintained visual quality for the website pages.
Writing SEO-Optimized Content
Search Engine Optimization (SEO) optimization of content will boost its search engine visibility. A proper SEO optimization requires utilization of appropriate keywords and meta description creation along with correct content organization. The search engines position websites more prominently in search results following implementation of SEO-friendly content so organic web traffic intensifies.
Here’s an example of how to write an SEO-friendly blog post section in HTML:
|
<article> <h1>Best Practices for Website Development</h1> <p>Building a website requires a combination of good design, quality content, and technical optimization. Here are some best practices to follow...</p>
<h2>1. Mobile Responsiveness</h2> <p>Ensuring that your website is mobile-friendly is crucial in today's digital world...</p>
<h2>2. Fast Loading Speed</h2> <p>Optimizing images and using caching techniques can significantly improve website speed...</p> </article> |
The website benefits from continuous content updates because they keep the material current. The website becomes more interesting through a combination of written blogs and FAQs along with case studies and testimonials which maintain its information value.
Step 6: Website Development – Bringing the Design to Life
During the development phase all planned components merge into a practical website structure. During this development stage developers write code for interface presentation components in the frontend part and server-based programming logic which operates within the backend.

Frontend Development
Frontend development focuses on the visual aspects of the website. Technologies like HTML, CSS, and JavaScript are used to create interactive user interfaces. Frameworks such as React.js, Vue.js, or Angular make development more efficient.
Here’s an example of a basic HTML, CSS, and JavaScript implementation:
|
<!DOCTYPE html> <html lang="en"> <head> <title>Interactive Website</title> <style> body { font-family: Arial, sans-serif; text-align: center; } .button { background-color: #007bff; color: white; padding: 10px 20px; border: none; cursor: pointer; } </style> </head> <body> <h1>Welcome to My Website</h1> <button class="button" onclick="showMessage()">Click Me</button> <p id="message"></p> <script> function showMessage() { document.getElementById("message").innerHTML = "Hello, World!"; } </script> </body> </html> |
Backend Development
The backend handles the logic, database interactions, and server-side functionality. Popular backend technologies include Node.js, Django, Ruby on Rails, and Laravel.
Here’s a simple Node.js + Express backend example:
|
const express = require('express'); const app = express(); app.get('/api/message', (req, res) => { res.json({ message: "Hello, World!" }); }); app.listen(3000, () => { console.log('Server running on port 3000'); }); |
Backend development ensures that user data is processed securely and efficiently. Using frameworks and best practices, developers can create scalable applications that perform well under high traffic.
Step 7: Testing & Quality Assurance – Ensuring a Bug-Free Experience
Once the website is developed, it must be tested thoroughly before launch. Testing ensures that all functionalities work as expected, the site is responsive, and there are no security vulnerabilities.
Types of Website Testing
- Functional Testing – Ensures that all website features, such as forms, buttons, and navigation, work correctly.
- Performance Testing – Measures the website's speed and responsiveness under different conditions.
- Security Testing – Identifies vulnerabilities to prevent hacking and data breaches.
- Responsive Testing – Checks if the website looks and functions properly on different devices (mobile, tablet, desktop).
- Cross-Browser Testing – Ensures the site works across multiple browsers (Chrome, Firefox, Safari, Edge).
Automated Testing Example (Selenium & Python)
Automated testing helps detect issues early and improves efficiency. Below is a basic Selenium test in Python:
|
from selenium import webdriver driver = webdriver.Chrome() driver.get("https://example.com") assert "Example Domain" in driver.title driver.quit() |
Testing is an ongoing process. Even after deployment, regular monitoring helps catch and fix bugs, ensuring a smooth user experience.
Step 8: Website Launch & Deployment – Going Live
After successful testing, the final step is launching the website. Deployment involves hosting the website on a web server and making it accessible to users.
Choosing a Hosting Provider
Web hosting services like AWS, DigitalOcean, Bluehost, and Vercel provide different levels of hosting solutions. Choosing the right hosting depends on factors like website traffic, security requirements, and budget.
Deploying a Website (Example: Node.js on Vercel)
To deploy a Node.js website using Vercel, follow these steps:
Install Vercel CLI:
npm install -g vercel
Navigate to your project folder and run:
vercel
Follow the setup instructions, and your website will be live.
Post-Launch Monitoring
After deployment, ongoing maintenance is necessary. Tools like Google Analytics, Lighthouse, and UptimeRobot help monitor website performance, security, and user engagement.
Final Thoughts – Mastering Website Development 2025
Building a successful website requires careful planning, structured development, and continuous optimization. Each phase of the website making process 2025—discovery, information architecture, wireframing, design, content creation, development, testing, and deployment—plays a critical role in delivering a high-quality website.
By following best practices, using the right tools, and implementing efficient workflows, developers can create websites that are fast, secure, and user-friendly. Whether you’re a beginner or an experienced developer, mastering the website development process is key to building impactful digital experiences.